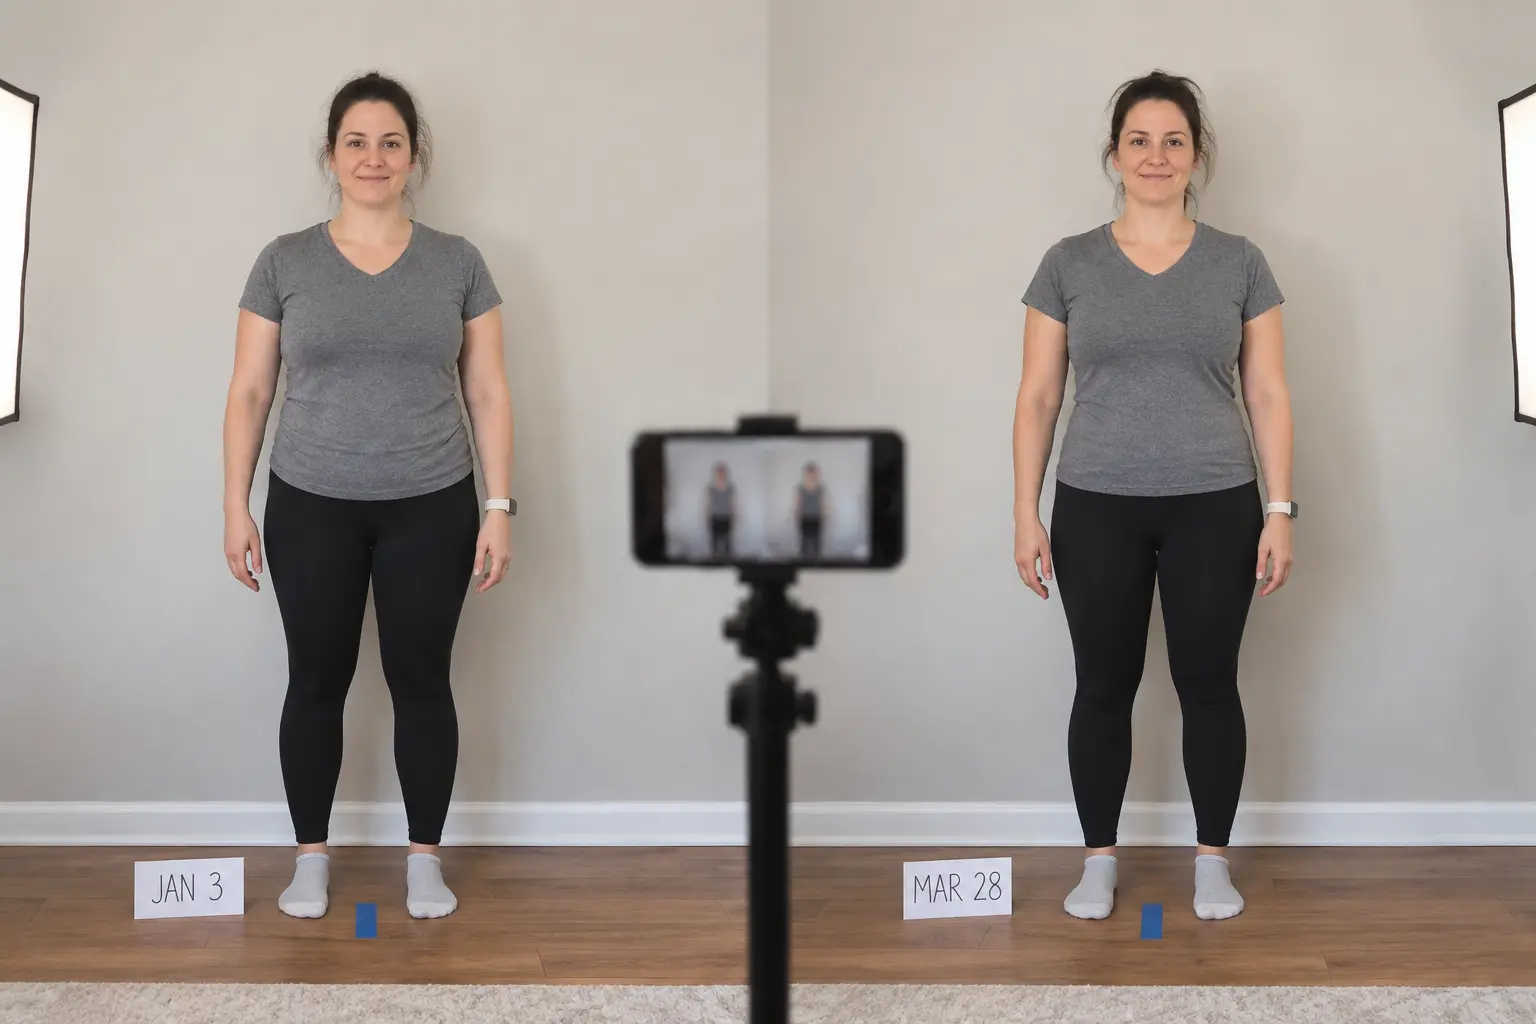
The problem with one-number progress tracking
Progress photography records visible shape under a specific camera angle, lens, distance, light, posture, clothing, crop, and moment in time. That sounds objective, but every result is produced by a procedure. If the procedure changes, the number or image can change even when the body has not changed meaningfully. The first task is therefore not collecting more data. It is deciding what the method can answer and making the next comparison reproducible.
Its main advantage is an accessible visual record of gradual shape change that may not appear clearly on the scale. Its central limitation is that lighting, camera height, lens perspective, flexing, twisting, a workout pump, dehydration, clothing, cropping, and filters can manufacture a dramatic difference. Treat the result as an estimate or observation, not a diagnosis, moral score, or permission to make an aggressive diet change.
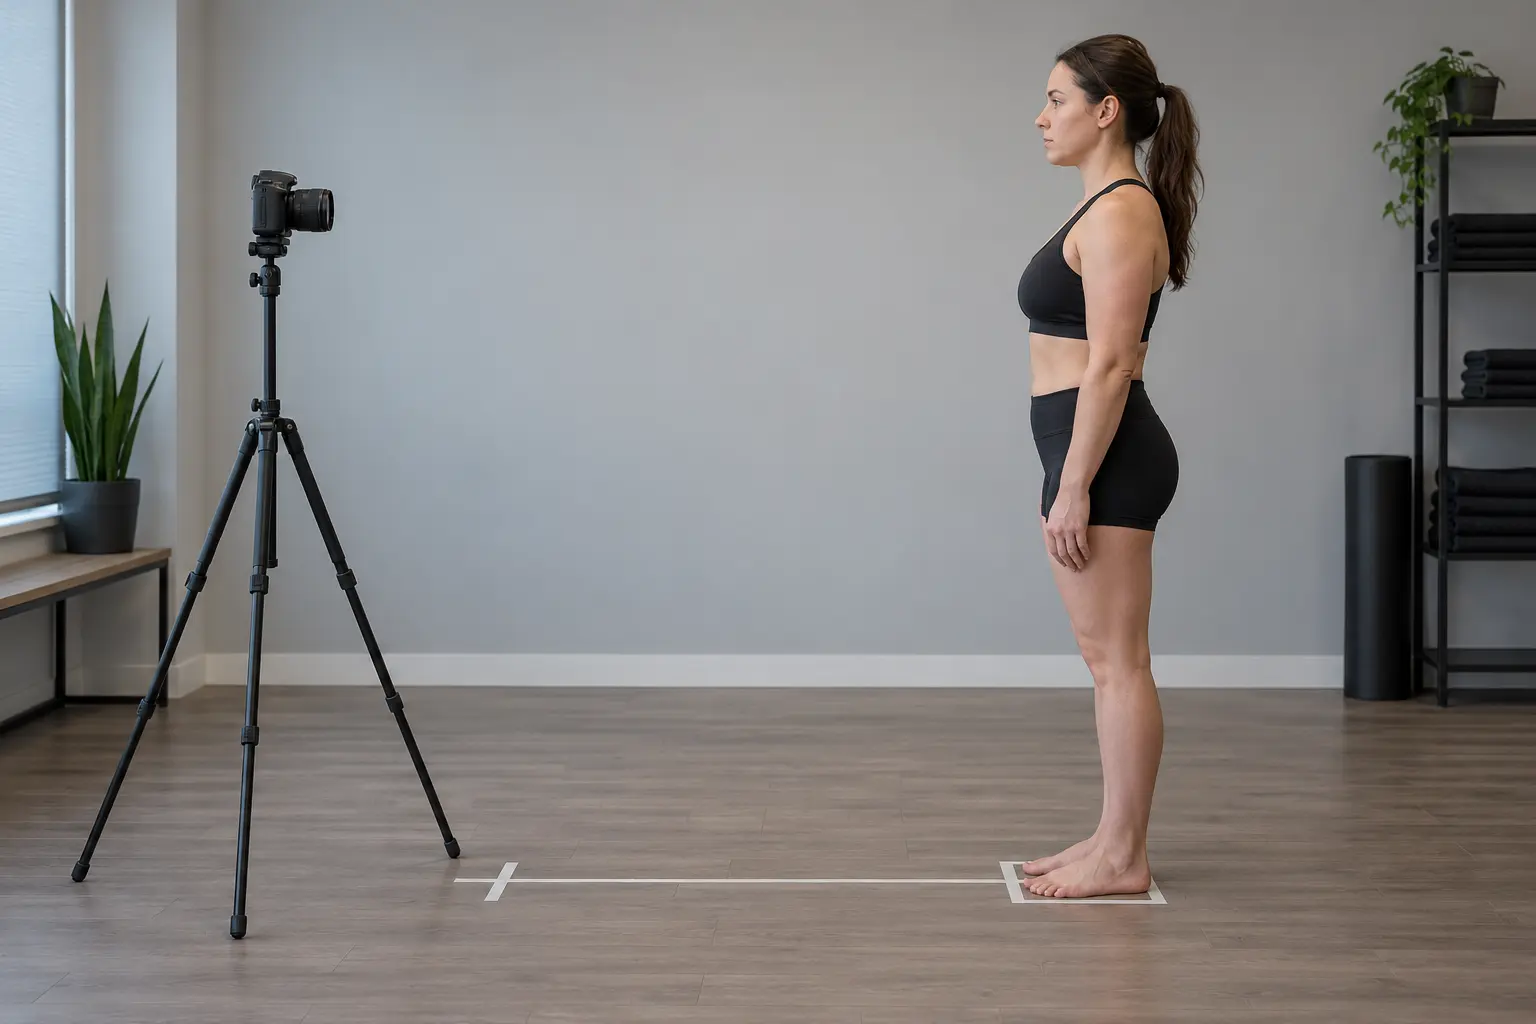
A repeatable practical protocol
- Mark the tripod and standing positions and keep camera height, lens, distance, and orientation fixed.
- Use the same neutral background, light sources, time window, clothing, and views.
- Stand naturally, exhale normally, and use the same relaxed posture.
- Save original files and do not reshape, filter, stretch, or change the crop.
- Protect the files and obtain specific consent before sharing any person’s image.
Worked example
A night photo after dinner is compared with a morning photo under side lighting, from a higher camera, with flexing and a tighter crop. The second looks leaner, but a matched retake shows that most of the drama came from presentation.
A four-part decision system
- Baseline: preserve raw results, setup details, date, and context.
- Threshold: define how much change and how many repeat observations matter.
- Triangulation: require agreement with at least one independent measure.
- Action: prewrite continue, investigate, adjust, and seek-care rules.
Use a scheduled interval rather than checking after every difficult meal or weigh-in. A longer interval gives real change time to exceed noise and reduces compulsive testing. For a broader system, use fat-loss progress dashboard and seven-day weight average.
A repeatable image without a misleading reveal
Before taking a baseline photo, choose one camera, lens setting, distance, height, orientation, lighting, background, posture, and clothing. A wide-angle lens close to the body can change proportions; overhead light and twisting can exaggerate definition. Keep those conditions similar at the follow-up and retain both unedited originals. Cropping, selective posing, tanning, dehydrating, or changing garment compression can create a dramatic visual difference that says little about a normal trend.
Set the interval in advance, perhaps monthly rather than daily. Small changes are hard to see when people inspect images repeatedly, and frequent comparison can become distressing. A side-by-side view is useful only when it answers an agreed question, such as whether a consistent waist or posture change is visible alongside other measures. Do not keep taking pictures until one finally looks better. The method should require little time and should not dominate the plan.
Photos show an appearance under particular conditions. They cannot reveal body-fat percentage, internal health, strength, or the reason for a change. A social-media before-and-after pair may omit weeks, lighting, medication, surgery, weight fluctuation, or commercial incentives. Treat it as a visual claim rather than scientific evidence. For your own record, note the date and relevant context without turning every normal variation into a verdict about personal success.
If a photo comparison seems to show a large shift that disagrees with clothing, measurements, and physical function, check setup first. If several independent signals align over time, a photo can support the broader interpretation without becoming the primary goal. Skip the method entirely when body-image distress, compulsive checking, or eating-disorder concerns make it counterproductive. A person can make sound health decisions without any progress photos.
Frequently asked questions
How often should I take progress photos?
Every two to four weeks under the same conditions is enough.
What conditions should I keep the same?
Lighting, time of day, clothing, distance, camera height and posture.
Are photos better than the scale?
They show changes the scale misses; use both together.
Keep the original record rather than only a summary. Future comparisons are easier when the raw observation, setup, relevant context, and reason for any excluded reading remain available. This also prevents a later change in an app, equation, garment, device, or personal goal from rewriting the baseline.
Sources
- Standardizing clinical photography
- Clinical photography in aesthetic practice
- Photographic standards in plastic surgery
- Body image and social comparison review
- FTC health-product guidance
Evidence reviewed September 16, 2026. Educational information only; not medical advice.